We have not been using this blog, but I thought I would post something and maybe revive it. This is my newest Covid hobby. I wonder how many I will get done in 2021. I'm also attaching a bear, that was an anniversary gift.
6 Northern Sisters
6 Sisters who live in Northern Ontario and a few spread out.. but we were all born in Northern Ontario.
Thursday, March 4, 2021
Sunday, August 2, 2020
Baby or Toddler Dress
The baby dress took lots of hours to make and was a fun challenge.
Picked out a pattern online, then went to the store to pick up the pattern. There was alot of time spent at the store trying to figure out what I wanted. Then more time was spent trying to figure out the pattern instructions once I got home. After all the fabric pieces were cut, it was like a puzzle to sew the dress together.
Saturday, February 2, 2019
Easy to make tiebacks made out of cotton
 |
| Easy to make tiebacks made out of cotton |
These curtain tiebacks are easily made from extra material. Tiebacks are situated around half way to two-thirds of the way from the top of the curtain. To hold it in place use a cup hook for small curtains or larger hooks for heavier curtains.
 |
| Tieback cut from cotton fabric and bias tape pieces for the ends. |
With a measuring tape, measure the tieback length. I measured around curtain and location of hooks, placed 3-5" away from window. Deduct 4" from length (5" deducted for the bias tape and 1" added for the seam allowance).
Cut 2 rectangle pieces, fold in half. Cut half a gentle circular pattern on paper and cut fabric to pattern.
Cut two loop pieces from bias tape fabric. Approximately 6"
For example for large lined curtains cut two pieces of 18" x 6 1/2 " fabric for finished size of 17 x 2 3/4" fabric. For total tieback length, add finished fabric plus tie loop length.
 |
| Place bias tape loops inside and pin. |
Sew bias tape fabric.
Place fabric pattern facing together. Place bias tape inside fabric at both ends. Pin. Sew with a 1/2" seam allowance, leaving a 1 1/2" opening towards the tieback. You can see the opening in the photo at the tip of the pencil.
 |
| Simple tiebacks made with cotton fabric. |
Turn inside out through opening. Sew opening.
Iron. Top stitch around fabric 1/4 inch from edge.
Hang.
 |
| Tiebacks for bedroom |
Saturday, December 22, 2018
Christmas Fabric Gift Bag
Christmas fabric gift bags create new sharing traditions. You can give these drawstring bags as gifts or use them within the family for years.
They are easy to make.
Supplies
1 yard or metre cotton dark Christmas print, bottom of bag
1 yard or metre cotton light Christmas print, top of bag
2 yard or metres plain cotton lining
10 yards or metres matching rope or string
Instructions
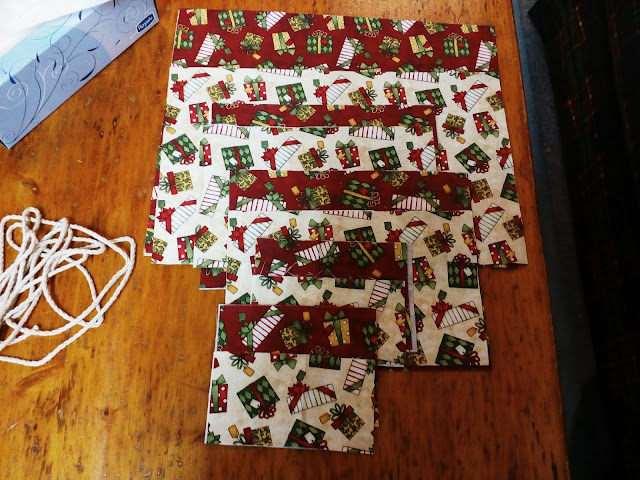
Cut dark, light and lining fabric in pairs.
Finished Bag size and cutting dimensions
Small bag size: 5 1/2" x 6 1/2" -- Dark Fabric: cut (6" x 3 1/4") x 2 pieces;
Light Fabric: cut (6" x 4 1/4") x 2 pieces; Lining Fabric: cut (6" x 7") x 2 pieces
Medium bag size: 9 1/2" x 13 1/2" -- Dark Fabric: cut (10" x 6 1/4") x 2 pieces;
Light Fabric: cut (10" x 8 1/4") x 2 pieces; Lining Fabric: cut (10" x 14") x 2 pieces
Large bag size: 14 1/2" x 20 1/2" -- Dark Fabric: cut (15" x 9 1/4") x 2 pieces
Light Fabric: cut (15" x 12 1/4") x 2 pieces; Lining Fabric: cut (15" x 21") x 2 pieces
Cut lining in pairs
Place one light and dark Christmas print right sides together. Two per bag.
Sew together, leaving 1/4 " seam allowance.
Iron seam open.
Place the two print pieces together, right side facing. For small bags mark on top piece, on both side at 1" and 1 1/2" ( 1 1/2" and 2 1/4" for medium and large bag) This is the opening for the rope or string.
Using a large thread spool to mark and cut round bottom corners.
Sew print fabric pieces together on the sides and bottom, leaving the marked openings for the string open. Use 1/4" seam allowance.
Place lining pieces together, mark or pin an 1 1/2" for small bag (2" for medium and large bag) opening on the side.
Using a large thread spool to mark and cut round bottom corners.
Sew lining pieces together on the sides and bottom, leaving an 1 1/2" (or 2") opening on the side to sew later. This opening is to turn bag inside out later. Use 1/4" seam allowance when sewing.
Turn lining inside out.
Place lining inside print fabric, right sides together.
Pin sides together.
Sew all around the top, leaving 1/4" seam allowance.
Pull out lining and find side opening.
Arrange side opening , tucking seam allowance inside and sew carefully on top.
Align lining inside.
Check opening for rope or string.
Sew top of bag at 3/4" from edge.(1 1/4" for medium or large bag)
Sew top again at 1 1/4 " from edge.(2" for medium or large bag)
Cut two 15" pieces of rope for small bag (30" x 2 for medium bag, 50" x 2 for large bag), or measure sides and top of bag for approximate length of rope x 2 ropes.
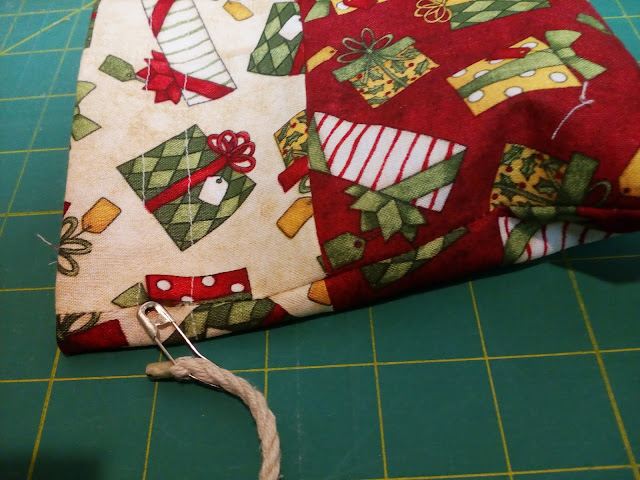
Insert rope. 15 " x 2 for small bags.
Tie rope ends together.
Finished bag.
Supplies
1 yard or metre cotton dark Christmas print, bottom of bag
1 yard or metre cotton light Christmas print, top of bag
2 yard or metres plain cotton lining
10 yards or metres matching rope or string
Instructions
Cut dark, light and lining fabric in pairs.
Finished Bag size and cutting dimensions
Small bag size: 5 1/2" x 6 1/2" -- Dark Fabric: cut (6" x 3 1/4") x 2 pieces;
Light Fabric: cut (6" x 4 1/4") x 2 pieces; Lining Fabric: cut (6" x 7") x 2 pieces
Medium bag size: 9 1/2" x 13 1/2" -- Dark Fabric: cut (10" x 6 1/4") x 2 pieces;
Light Fabric: cut (10" x 8 1/4") x 2 pieces; Lining Fabric: cut (10" x 14") x 2 pieces
Large bag size: 14 1/2" x 20 1/2" -- Dark Fabric: cut (15" x 9 1/4") x 2 pieces
Light Fabric: cut (15" x 12 1/4") x 2 pieces; Lining Fabric: cut (15" x 21") x 2 pieces
Cut lining in pairs
Sew together, leaving 1/4 " seam allowance.
Iron seam open.
Place the two print pieces together, right side facing. For small bags mark on top piece, on both side at 1" and 1 1/2" ( 1 1/2" and 2 1/4" for medium and large bag) This is the opening for the rope or string.
Using a large thread spool to mark and cut round bottom corners.
Sew print fabric pieces together on the sides and bottom, leaving the marked openings for the string open. Use 1/4" seam allowance.
Place lining pieces together, mark or pin an 1 1/2" for small bag (2" for medium and large bag) opening on the side.
Using a large thread spool to mark and cut round bottom corners.
Sew lining pieces together on the sides and bottom, leaving an 1 1/2" (or 2") opening on the side to sew later. This opening is to turn bag inside out later. Use 1/4" seam allowance when sewing.
Turn lining inside out.
Place lining inside print fabric, right sides together.
Pin sides together.
Sew all around the top, leaving 1/4" seam allowance.
Pull out lining and find side opening.
Arrange side opening , tucking seam allowance inside and sew carefully on top.
Align lining inside.
Check opening for rope or string.
Sew top of bag at 3/4" from edge.(1 1/4" for medium or large bag)
Sew top again at 1 1/4 " from edge.(2" for medium or large bag)
Cut two 15" pieces of rope for small bag (30" x 2 for medium bag, 50" x 2 for large bag), or measure sides and top of bag for approximate length of rope x 2 ropes.
Insert rope. 15 " x 2 for small bags.
Tie rope ends together.
Finished bag.
Friday, February 2, 2018
Pot holders using quilting fabric
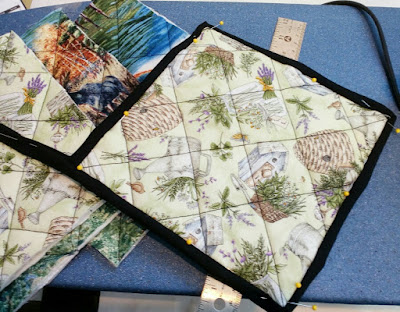
Start from the bottom and scroll up to see how these were cut and sewed together like a small quilt. Great winter project. Cut fabric size is 8.5" x 8.5"
Pick two separate cotton fabric, cotton batting, shinny grey Insul Bright fabric for heat resistance, cotton border material and cotton thread. Cut fabric, batting and Insul Bright. 8.5" x 8.5".
 |
| Pot holders using quilting fabric. |
 |
| Front loop |
 |
| Loop from the back. |
 |
| Stitch in the ditch sewing. |
 |
| Pinned border. |
 |
| Back view. Pin border from the front of the pot holder. |
 |
| Stop sewing the border at the last inside corner. Sew border on the front. |
 |
| Quilting the top of the pot holder. I use a ruler as a guide instead of marking lines. |
 |
| Marking the longest lines with a ruler. |
Pressing gently into the fabric with a ruler just before you sew the quilt lines makes it easier to sew a straight line. |
 |
| Layers of fabric, front fabric is on top. |
Thursday, June 18, 2015
Thursday, March 5, 2015
Subscribe to:
Comments (Atom)


.jpg)
.jpg)
.jpg)
.jpg)